The No-Drill Doorbell Plan: Putting a Video Bell on a Composite Door Without Regret
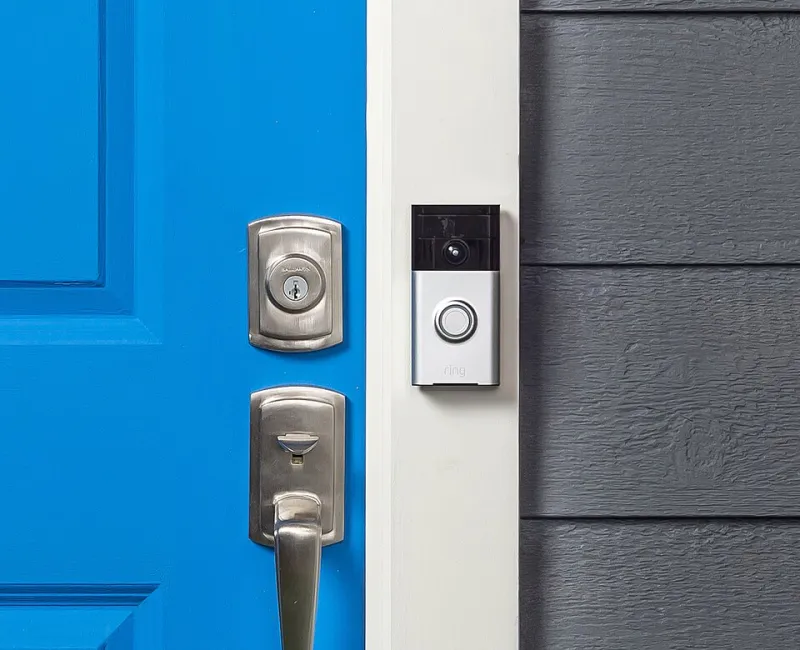
Photo: Ring, CC BY-SA 4.0, via Wikimedia Commons
A video doorbell has become one of those front-door extras that feels almost normal now. You can see who is at the door, have a word with the courier, and check a notification while you are upstairs or at work. Fair enough. The tricky bit is that a composite door is not a plain timber plank. It is a built-up slab with a skin, a core, reinforcing, seals and often a glazing cassette. Put a fixing in the wrong place and you can create a small hole with a much bigger consequence.
So this is not a scare story about doorbells. It is a planning piece. Before anyone reaches for a drill, work out where the bell should go, what powers it, and whether the door manufacturer is happy with the idea at all.
Start with the warranty, not the drill
The first job is not measuring the height for the camera. It is checking the paperwork. Composite door warranties vary quite a bit between manufacturers, and many will have something to say about holes drilled into the slab or frame after fitting. A doorbell fixing might be treated as a minor modification, or it might be treated as the kind of change that affects a weather seal or security claim. You do not want to find out at the point of a claim.
Ask the door manufacturer and your installer for written confirmation. Not a nod and a 'should be fine'. Written confirmation. If the answer is that mounting on the door slab affects the warranty, the sensible route is usually to mount the bell on the wall beside the door instead. That keeps the door untouched and still gives you a clear view of the doorstep. It is also easier to run a cable to a wall than to a moving door.
If the door is still being specified, mention the doorbell before the order goes in. That is the easiest moment to sort a cable route, a power supply or a suitable mounting position.
Where a video bell actually belongs
The best position is usually beside the door, at roughly chest or face height — around 1.2m to 1.5m from the ground is a common starting point. High enough to see a face, low enough not to be a stretch for a child or a shorter visitor. Angle the camera so it catches the approach path, not just the top of someone's head.
Keep it away from glazing. Decorative glass, side lights and glazed panels can throw reflections back at the camera, especially at night when infrared comes on. A bell pointed at a shiny surface can end up recording a bright blur rather than a person. Also keep the fixing clear of the letterbox, handle, lock and hinges. You do not want to block the letter plate, foul the handle, or make the door awkward to use.
If the bell has to go on the door itself, the fixing points matter enormously. Avoid drilling anywhere near the lock case, the cylinder, the hinge reinforcement or the edge of a glazing cassette. Do not pierce the weather seal or the bottom weather bar. Ask the manufacturer which zones, if any, are approved for fixings. A composite door may look uniform from the outside, but the inside is not uniform at all.
Battery or wired? The honest trade-off
Battery doorbells are the easy answer for many homes because they avoid a cable through the wall. The catch is maintenance. You will be taking the unit off to charge it, and battery life drops in cold weather. A doorbell that is fine in July can start sending low-battery warnings in January. If the bell is mounted high or in an awkward spot, charging becomes a small chore you will resent.
Wired models are more set-and-forget, but they need a suitable power supply. Do not assume the old doorbell transformer is up to the job. Video doorbells often have specific voltage requirements, and an old chime may not be compatible. Some models can be hardwired from an existing low-voltage supply; others need a plug-in adapter or a qualified electrician. Check the manufacturer's requirements before buying.
There is also a middle option: a battery doorbell with a hardwired trickle charge. That can work well if the wiring is already there, but it still needs the right supply and a sensible cable route. The key point is to choose the power method before you choose the fixing point. Not the other way round.
Cable routes that do not wreck a door
A cable should not be run through the door slab if it can possibly be avoided. A moving door plus a cable entry hole is a recipe for wear, water ingress and seal damage. The cleaner route is through the wall beside the door, using a small exterior-grade cable and a drip loop so water runs away from the entry point. Seal the hole properly with a suitable external sealant, and use conduit if the cable is exposed.
Drilling through the frame is usually a last resort. Composite frames can contain reinforcement, and the frame is part of the door's weathertightness. If a frame route is unavoidable, get the manufacturer's approval and follow their guidance exactly. Do not tuck a cable behind the weather seal, through the letterbox, or through a glazed panel. Those shortcuts tend to end in draughts, leaks or a failed seal.
If the door is not fitted yet, ask your installer to provide a cable route before the frame goes in. It is far easier to plan a small conduit or a blanked entry point at that stage than to retrofit one afterwards.
The questions to ask before anyone reaches for a drill
A good installer will not mind these. A rushed one might.
- Will mounting the doorbell affect my door warranty, and can I have that in writing?
- Which exact fixing points are approved on this door model?
- Does the position interfere with the lock, glazing, hinges or weather seal?
- Where will the cable enter, and how will it be sealed?
- Is the existing transformer and chime compatible with the doorbell I want?
- Who makes good any surface damage if something goes wrong?
- Can the bell be removed later without leaving the door vulnerable?
- Does the camera angle avoid next door's property and shared areas?
The last one is worth a moment's thought. A video doorbell should watch your doorstep, not your neighbour's front path. Adjust the angle and use the privacy zones in the app if the model has them.
A sensible order of operations
Decide where the bell will go. Check the warranty position. Choose battery or wired with the power supply in mind. Buy the model that suits the location, not the one that was on offer. Then let the installer fit it. If the door can stay drill-free, let it stay drill-free. A wall-mounted bell beside a composite door is often the neatest answer, and it keeps the door doing its real job: sealing, securing and looking smart.
In short, ring the manufacturer before you drill. It is a lot easier than ringing them afterwards with a warranty question and a small hole you cannot undo.